Thank you for joining us for another Simply Sketched Saturday Challenge! We’re so excited to be sharing this hop with you. The products used are all available in the current Annual, or seasonal, Stampin’ Up!® Catalogues. Simply use the buttons at the bottom of the post to keep hopping!

Here is this month’s sketch by Kathleen Rintoul-Waite from Lilypopcrafts.
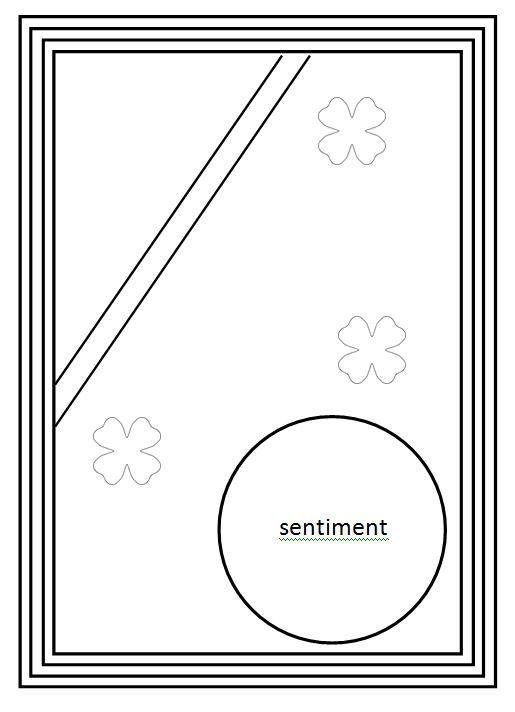
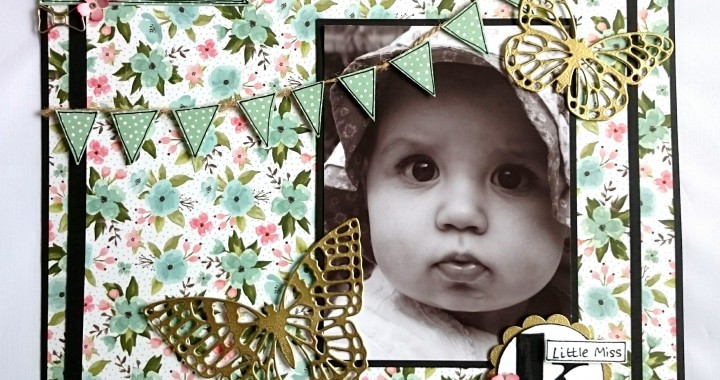
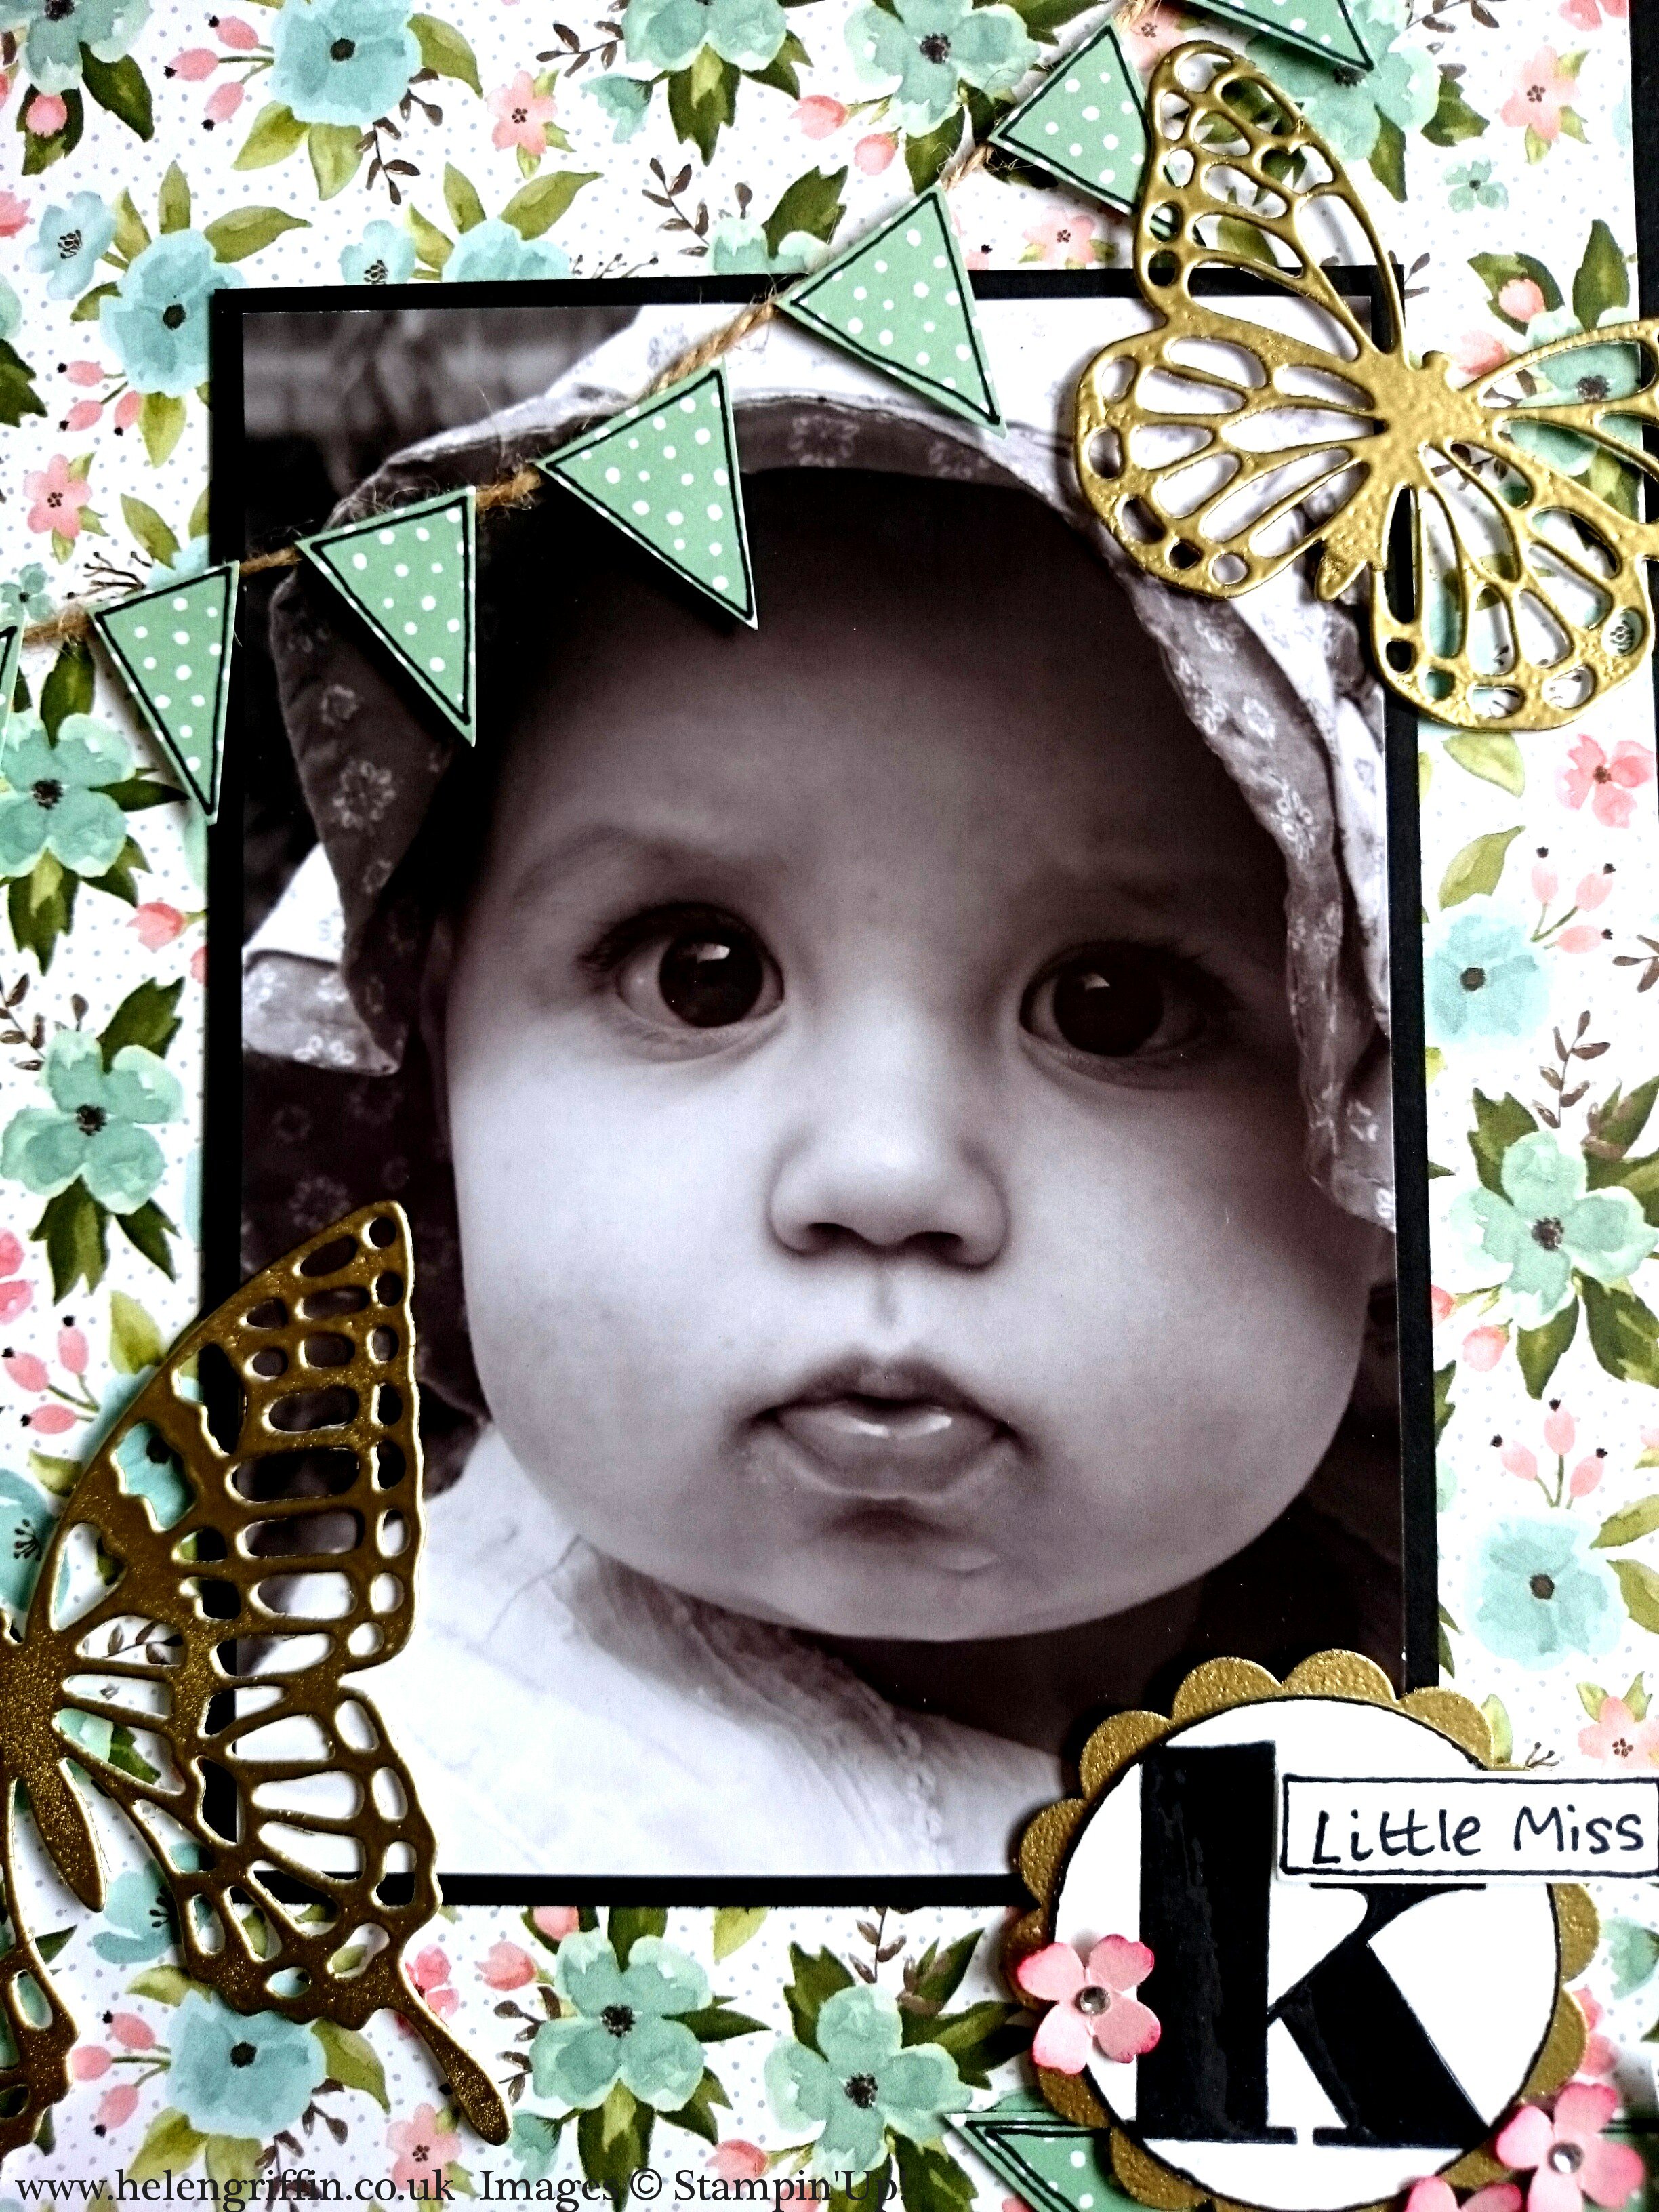
My initial thoughts were to make another card but I’ve been scrapbooking an awful lot recently. So I thought I’d adapt the sketch to a 12×12 layout. I wasn’t too sure where to put my chosen photo – perhaps I could use it as the large circle? But I thought that would be a good place for the title and a good chance to use my scallop punch before it retires end of May. I decided to put the photo behind all the elements on the sketch. Here’s how I made it…

Getting Started
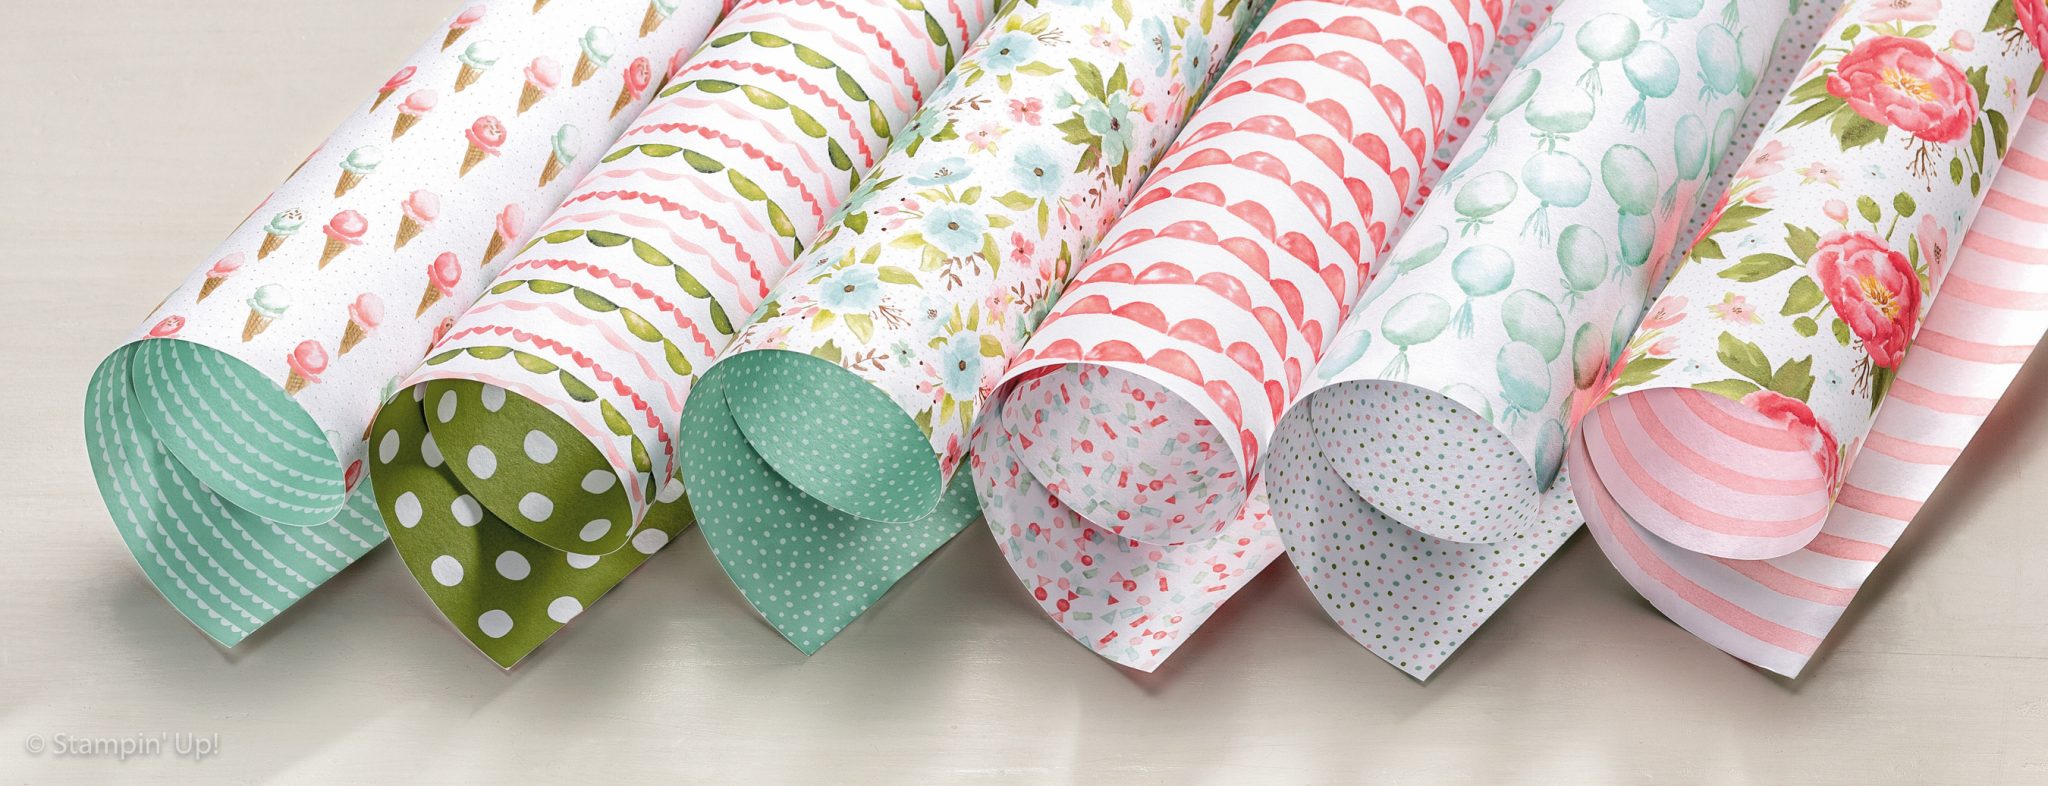
I knew instantly that I was going to use the diagonal line on the sketch as bunting. Before I could place that down I started with my background layers (as per the sketch). I only used one sheet of patterned paper for the background – I cut a square out of the middle and placed a piece of black cardstock over it to cover the hole and then adhered the square over the top of that. I chose my paper from the Birthday Bouquet Designer Series Paper (also featured on my home page) and here is the collection (Last chance to buy as it’s retiring on 31st May). Can you tell I really like this paper collection?
Papers and Bunting
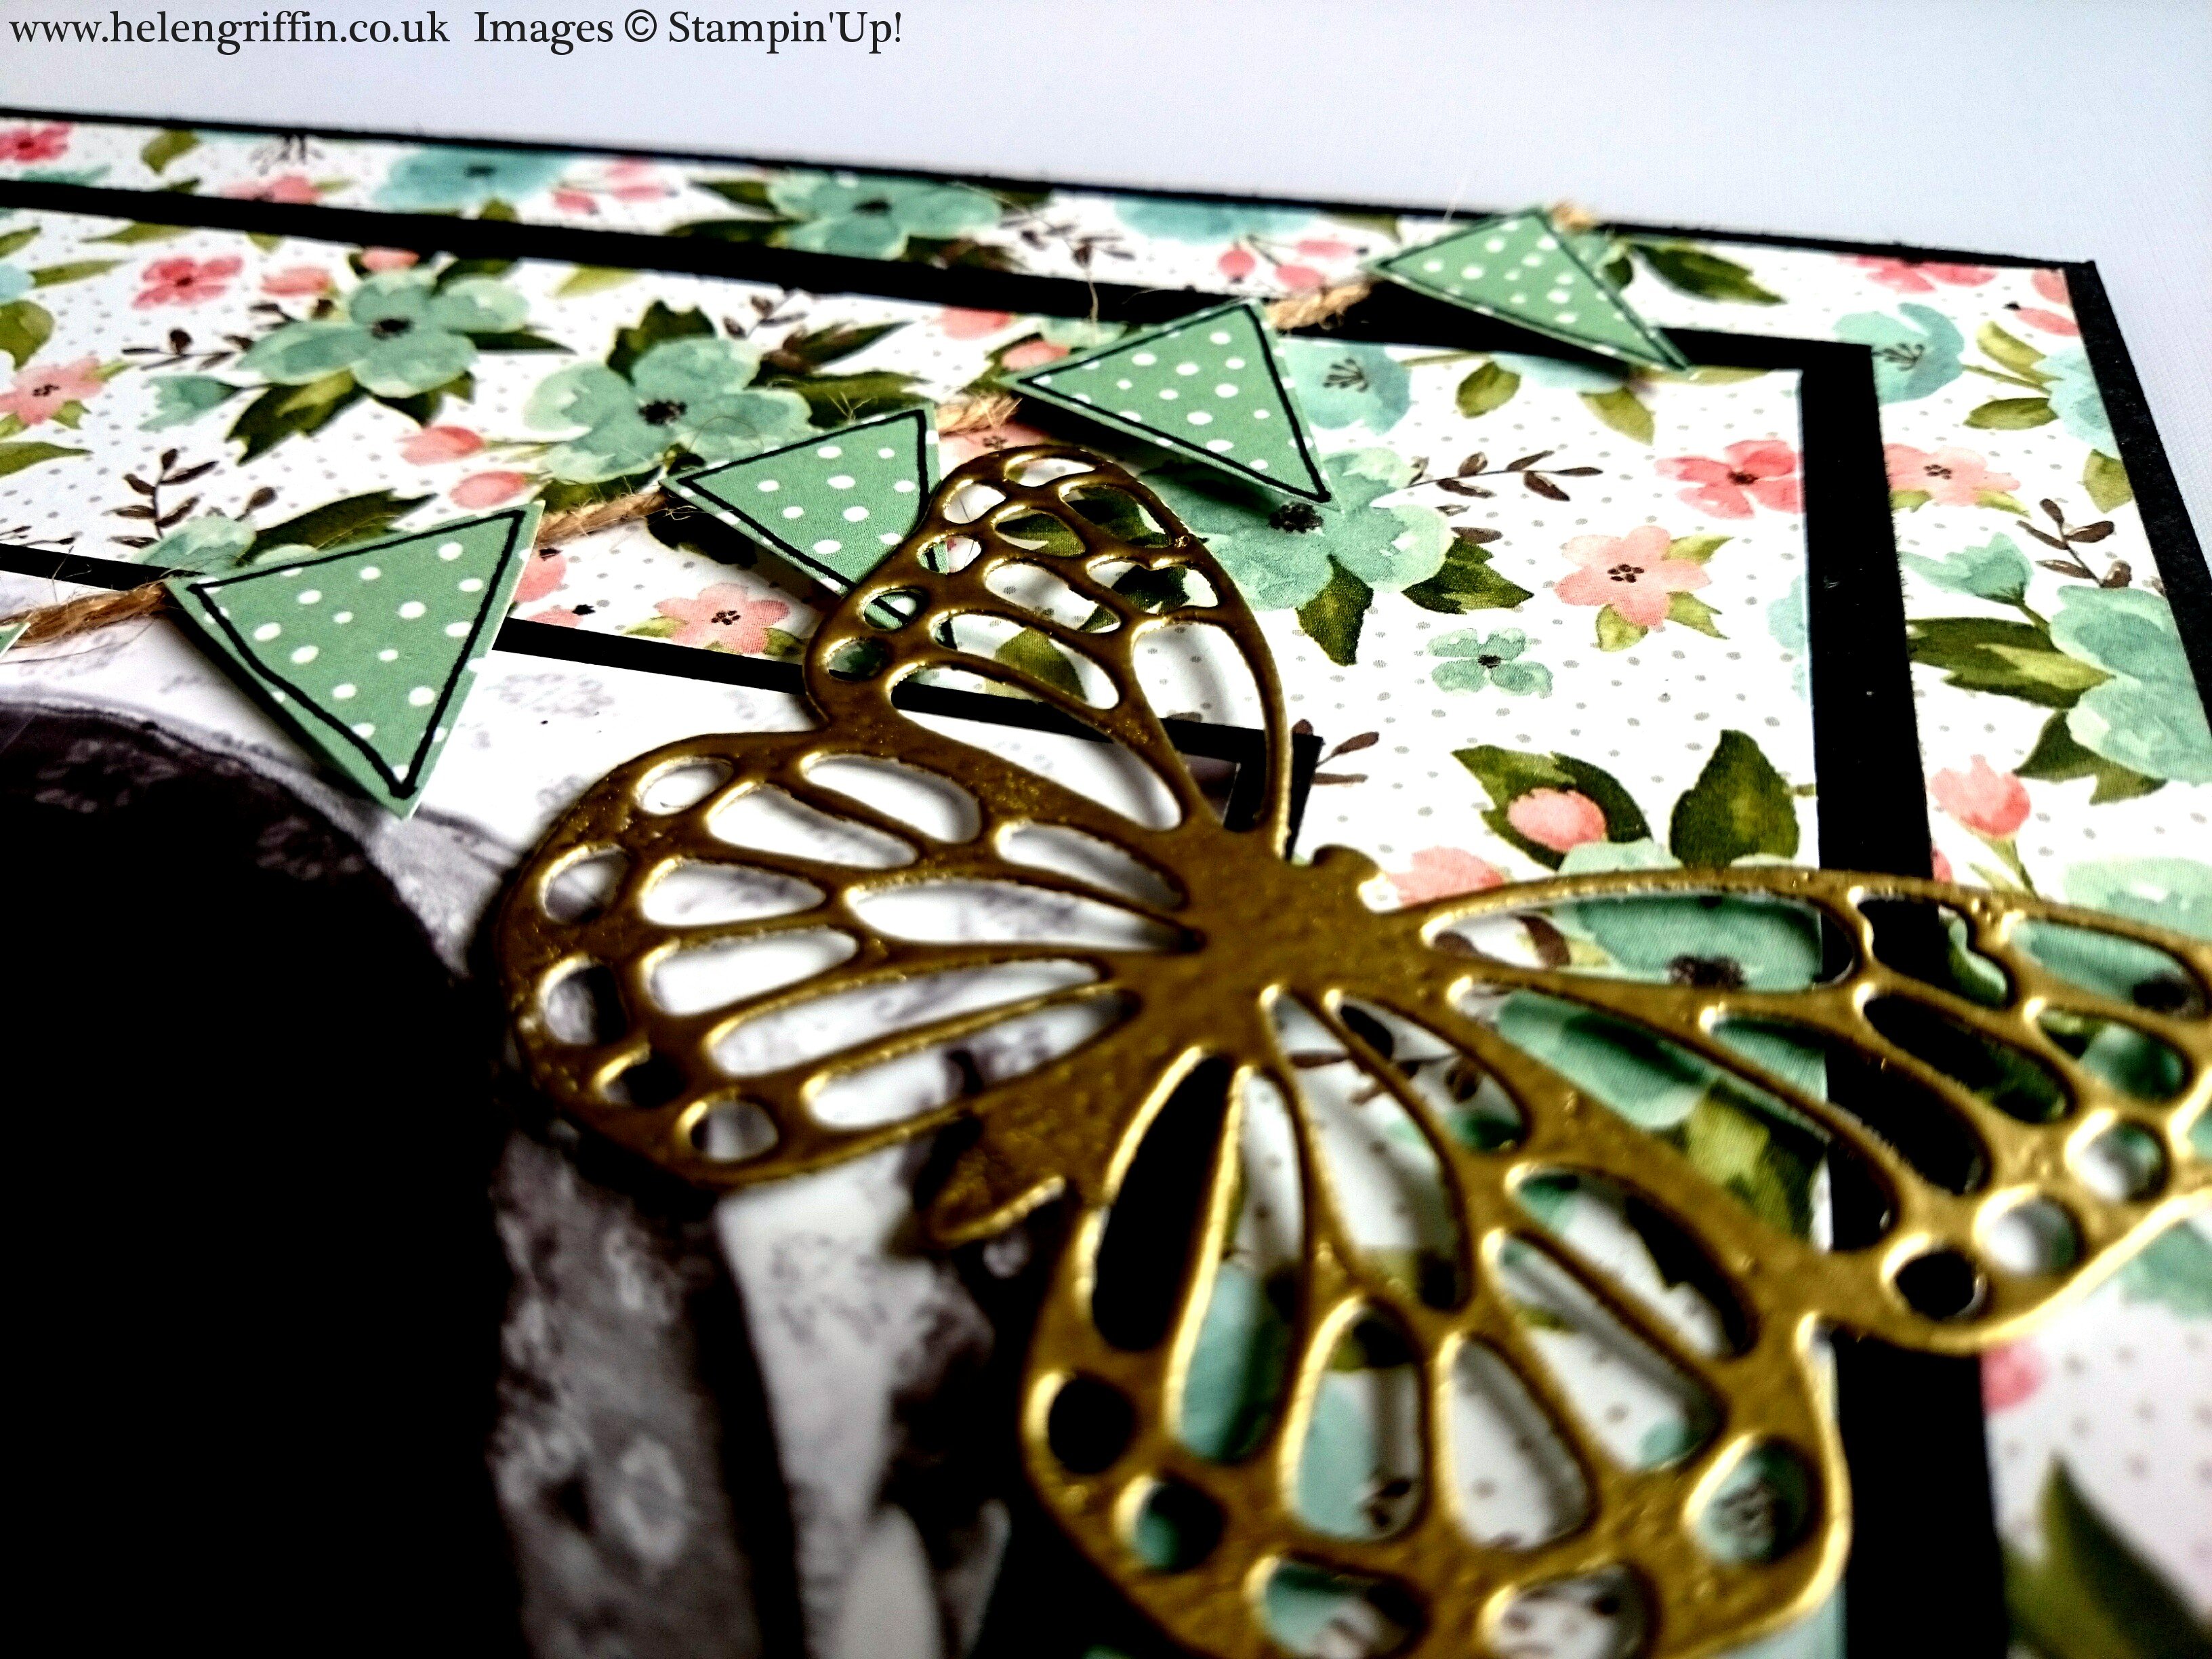
As per the above picture, you can see that I used the other side of the paper for my bunting and banners. Each pack comes with 2 of each design, so I trimmed some strips from the second paper and snipped out the triangles. The bunting blended in with the busy background, so I outlined them with a black pen. I grabbed some of my gardening jute twine from my garden tool box as I wanted it to look like a nice thick rope and stuck that down with some glue dots. I then stuck the bunting down with some snipped up dimensionals to raise them up.
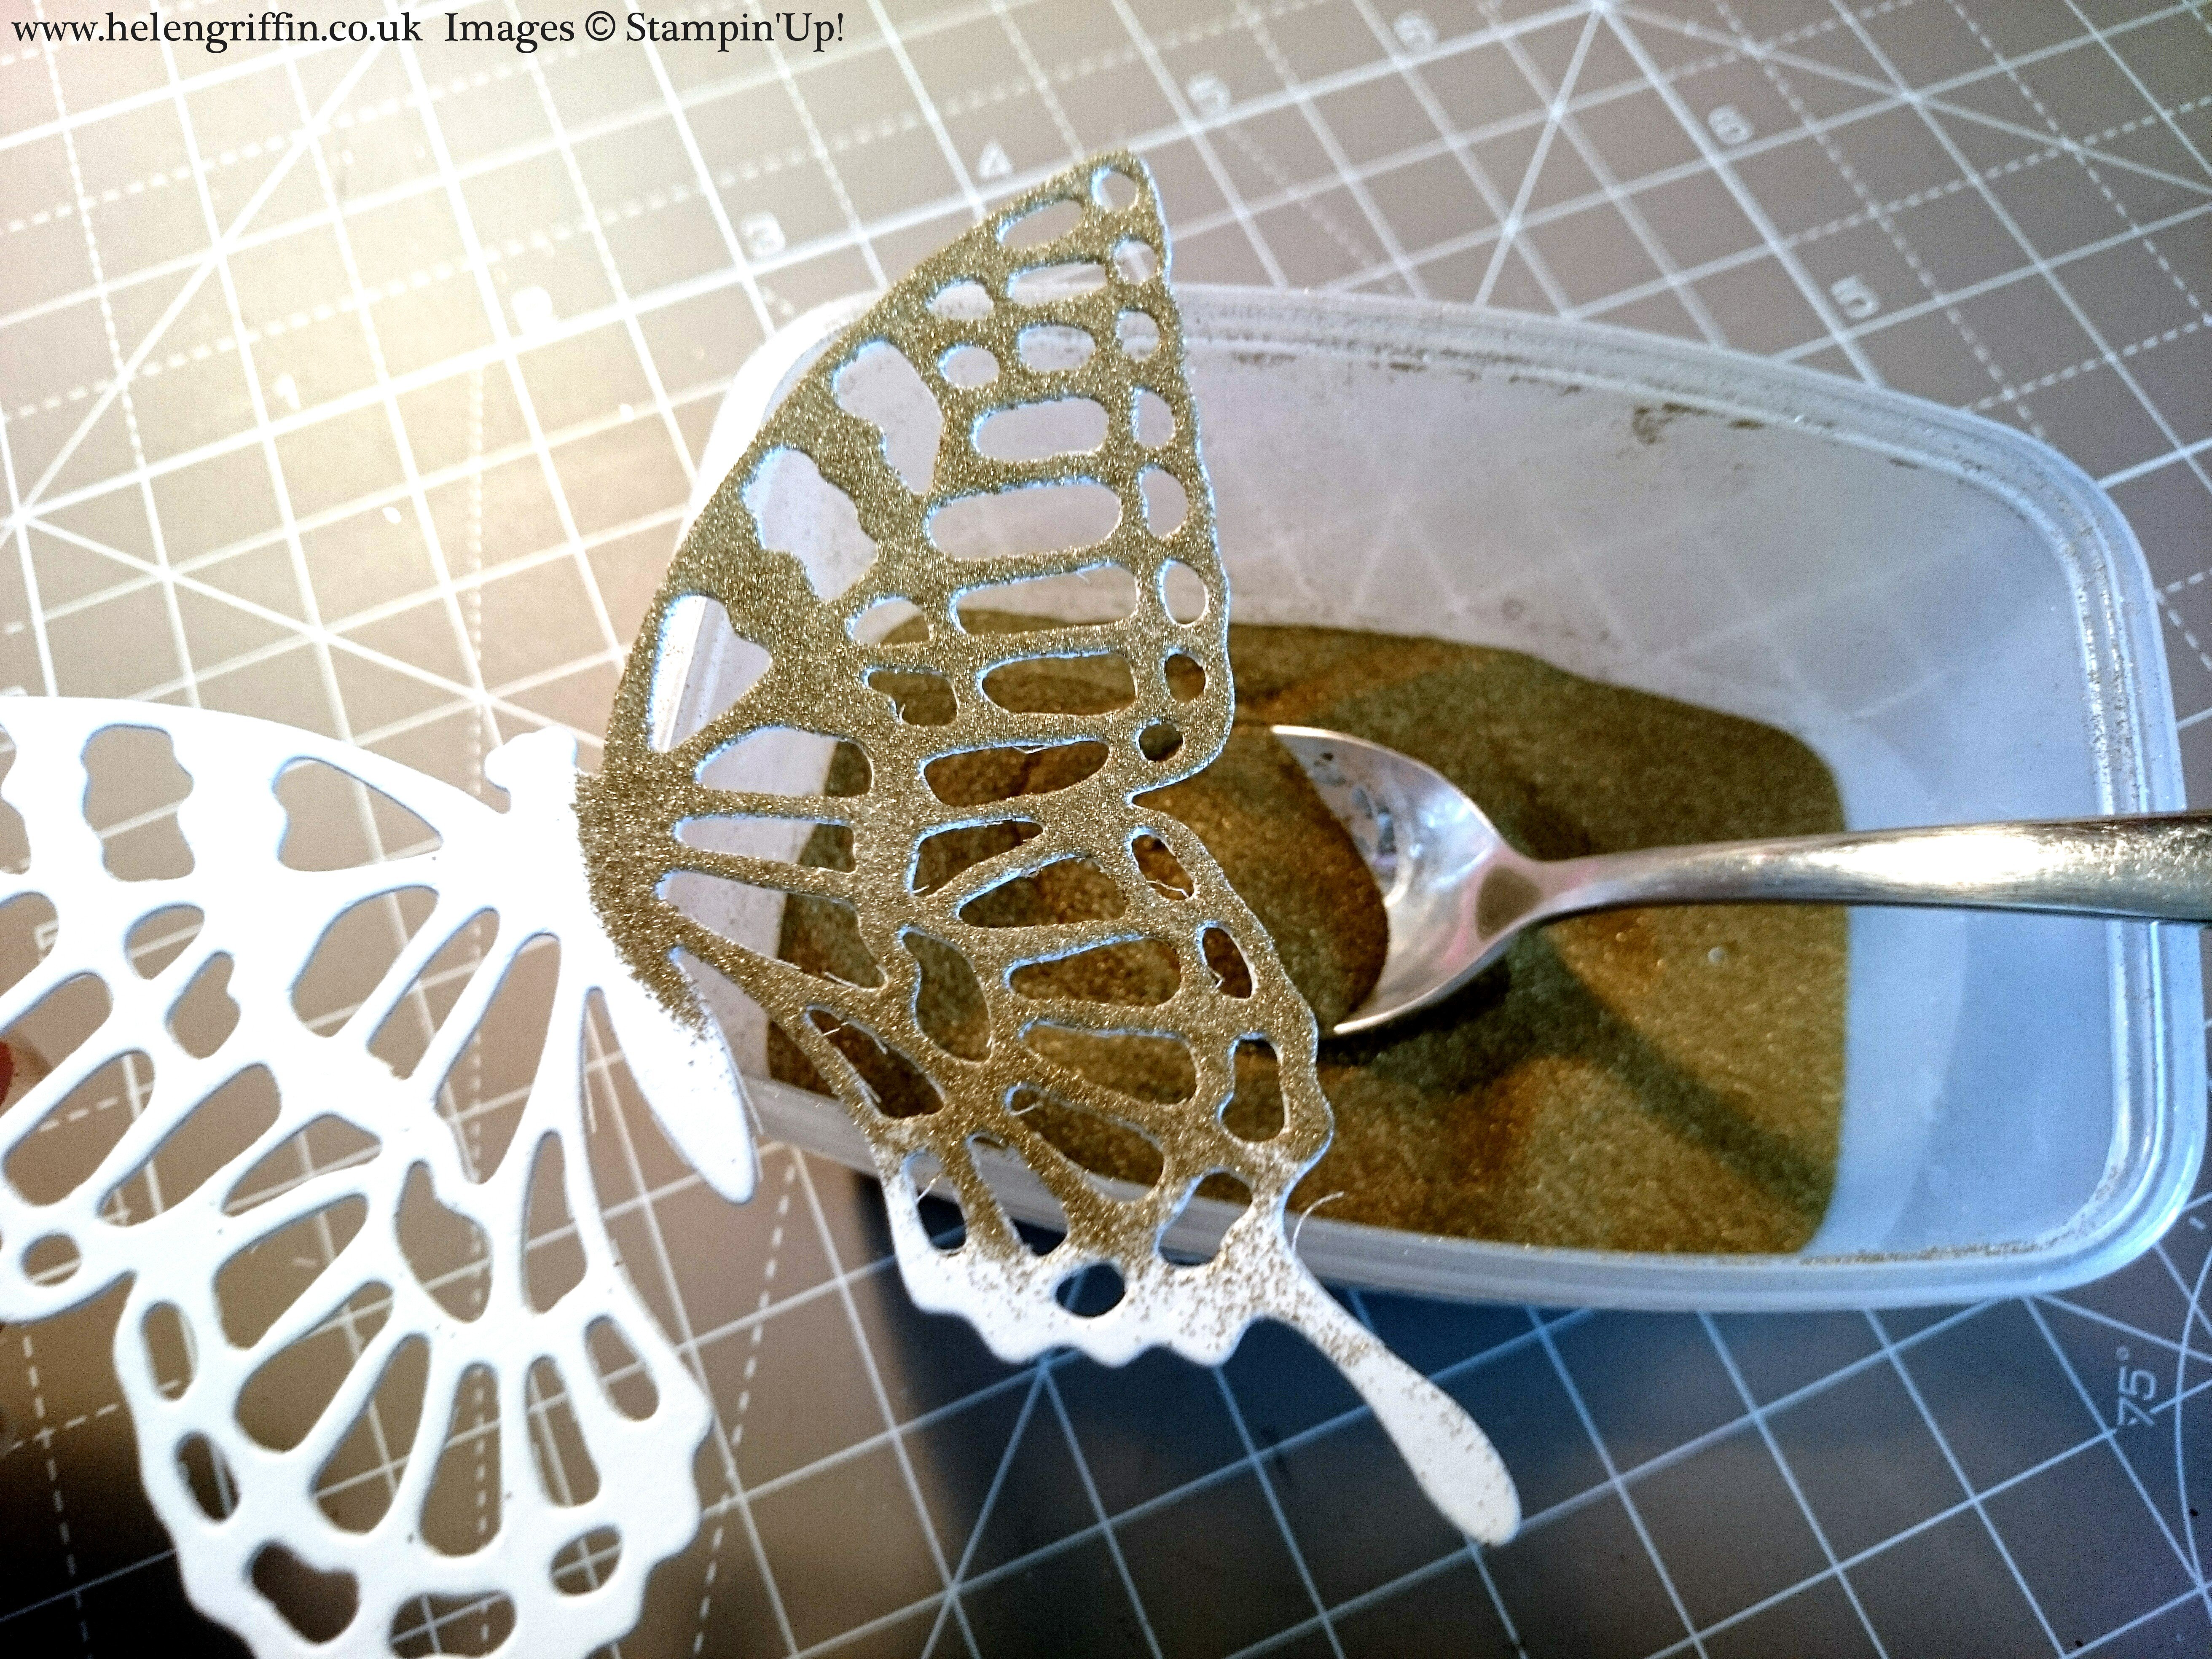
Gold Heat Embossed Butterflies
Now this is something I am very happy about – the Butterfly Basics stamps, Butterfly thinlets and gold embossing powder are moving into the next catalogue! I love this set and I use it quite a bit. To make the gold butterflies I simply used the butterfly thinlets dies and the Big Shot with the magnetic platform. After the butterflies were cut out I smothered them with versamark ink (it’s clear & very sticky btw) and then covered them with gold embossing powder. From the photo you can see that I empty my powder into a container and use a spoon – this saves making a mess by emptying it out onto paper every time. Holding only the sides, I used the Heat Tool to melt the powder. If you miss some bits with the powder, simply repeat the process until it’s all covered. Now, some of you may be thinking I could have used gold foil sheets (mirri card) but…one, I didn’t have any and two, I wanted my butterflies to be matt/satin. Using gold foil sheets of card or glitter card would totally work for this if you don’t want to heat emboss.
Title and Journaling
I decided to keep this simple and used a monogram inside the circle and added a bit of writing to finish it. I am an absolute sucker for alphabet stamps – I can’t stop buying them! They are so useful for scrapbooking and I tend to use them for making my own titles – much cheaper in the long run than buying a packet of letters. I also heat embossed the scalloped piece of card behind the circle – simply wipe the versamark ink pad over the edges and dip it in the powder.
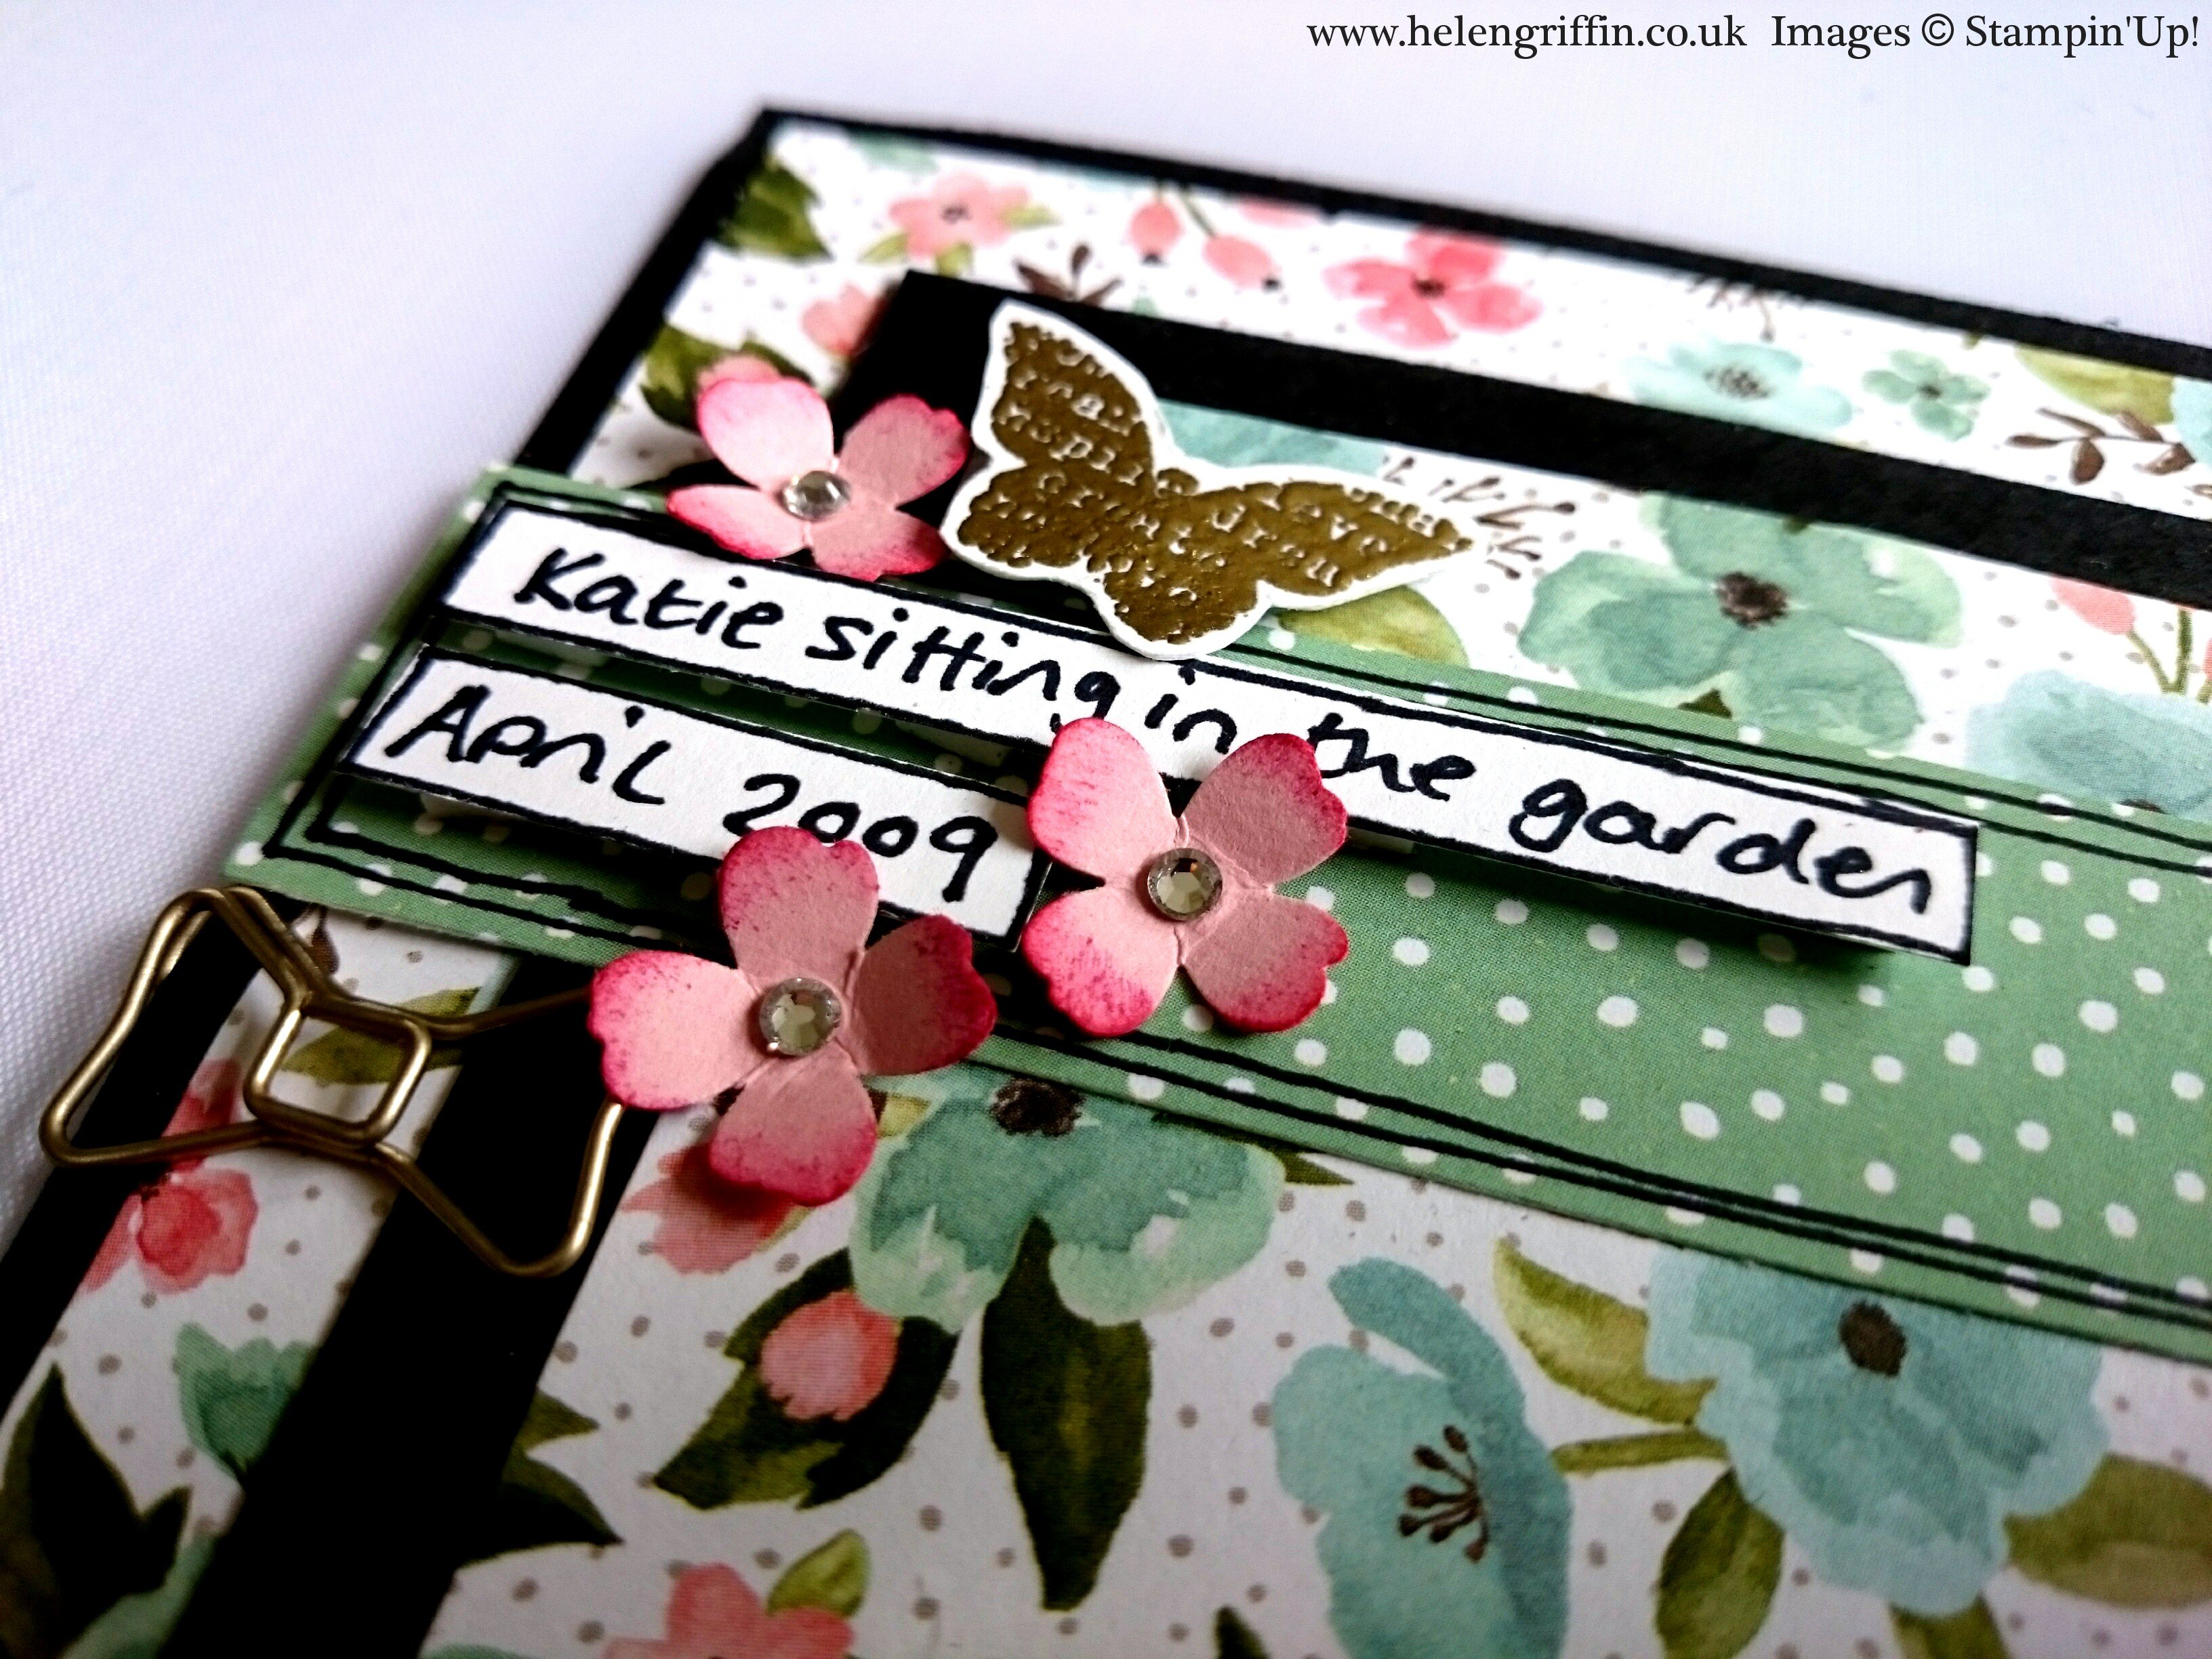
Finishing Touches
Usually, a scrapbook page isn’t finished until you’ve put on some kind of embellishments – the finishing touches. Again, I like to make my own – mostly using my stamps and dies. You can custom them however you like to match your page. Here I have gold heat embossed some smaller butterflies and punched out and inked some itty bitty flowers with rhinestone centres. And to finish it all off, I’ve added some cute little bow paperclips.
Have a go!
I really hope today’s post has inspired you to get started in scrapbooking. My advise would be to just give it a try! If you are already a papercrafter, then you have a head start as you will have most of the stuff needed to get started. If you are not too sure where to start (and I suffer from blank page syndrome ALL THE TIME) then why not try using a sketch or finding a page to scraplift (copy). I am also on Pinterest and have boards for scrapbooking inspiration and sketches – it’s a good place to start so click here if you fancy taking a peek.
Everything I have used today can bought through me from Stampin’Up! – Click here to shop now or browse all the products I have used at the bottom of the page.
I hope you enjoyed this months Simply Sketched Challenge. Don’t forget to use the buttons below to keep hopping!
And remember, I am always happy to help if you need it. I love sharing this fantastic hobby and you can contact me here.

Product List


Love this Helen, great take on the sketch.
Simply gorgeous. X
This is really lovely xx
Stunning – so nice to see a scrapbook page – its my first love and I’ve not been doing enough of it. Thanks for the inspiration
Thank you Fiona 🙂 I challenge you make a layout – especially if it’s been a while Xx
I absolutely love this, Helen! I’m not a scrapbooker, so am in awe of this talent xx
Thank you Karen, you are already halfway there as you’ll own most of the stuff to get started xx
Stunning scrapbook page Helen xx
Stunning, inspirational project Helen. And Little Miss K is adorable!
I was hoping to see some great alternatives to the sketch, and this is FAB. Love the bunting idea.
Kathleen x
Thank you Kathleen, I really enjoyed this sketch Xx
Lovely Helen!
Beautiful take on the sketch Helen. Great use of products and space. Little Miss K is the cutest ever. Just lovely.xx
Thanks Sally – she’s all grown up now at 7yrs old! Xx
I love the bunting Helen, looks brilliant xx
Thank you, I knew exactly when I saw the diagonal line it would be perfect for bunting xx
I love your layout Helen x Absolutely stunning!
Thank you Ania Xx
Absolutely gorgeous xx
Lovely Helen x
love this page 🙂 xxx