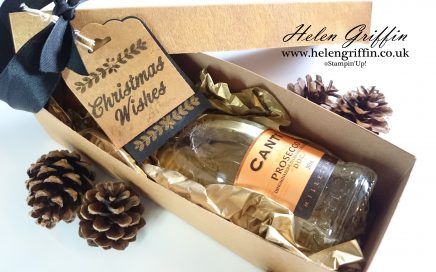
Christmas In July DAY 1 | Mini Champagne/Wine Gift Box
Welcome to Day 1 of Christmas in July and I’m so excited to get this series started! Today, we are making a gift box for a mini bottle of wine.
Welcome to Day 1 of Christmas in July and I’m so excited to get this series started! Today, we are making a gift box for a mini bottle of wine.
Today’s tutorial is a cute folio with even cuter paper….I really enjoyed making this little folio and can’t wait to fill them up with tiny photos.
Moving on from Saturday’s blog hop, here is the tutorial on how to smoosh with the brand new Floral Statements from Stampin’Up!
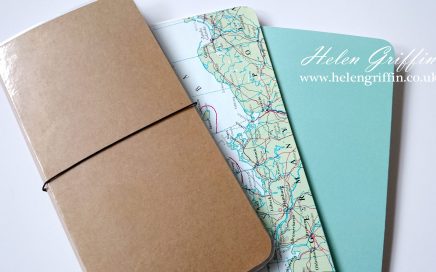
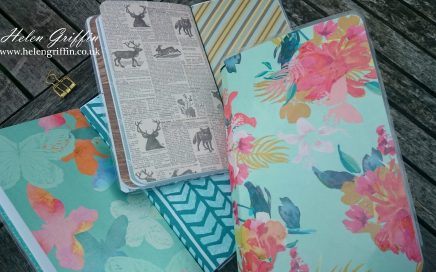
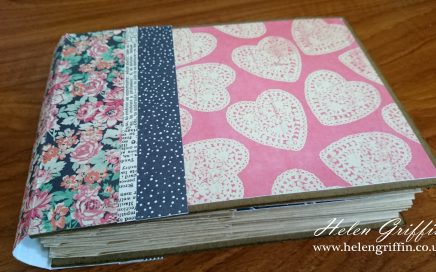
I’m enjoying making my own Traveler’s Notebooks (or TN’s) at the the moment and I’ve started to look around for items that I can include or make them from.
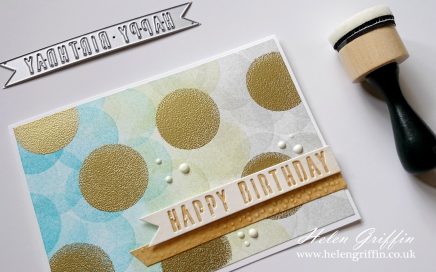
This technique is very simple, but also very effective – especially when you don’t stick to one colour. Here’s how to make the most out of your circle blending tool or sponge dauber.
If you go on a hop today, you’re sure of a lovely surprise! Please join us for this month’s blog hop and instead of working from a sketch, we were challenged with a colour scheme.
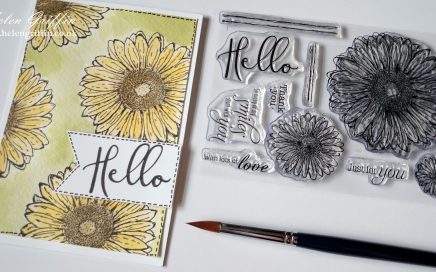
There were two things that drew me to buy this stamp set – first, it had a large ‘Hello’. I love any sort of ‘Hello’ stamp and secondly, I adore sunflowers. Then I noticed the stamp set was called Dainty Daisies!
If there ever was a reason for owning a laminator, this project alone would be reason enough. If you have one? Go blow the dust off it. If you don’t have one? Don’t hold me responsible for another gadget added to your stash!
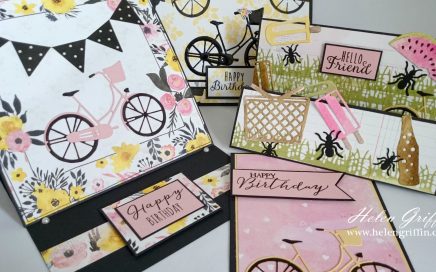
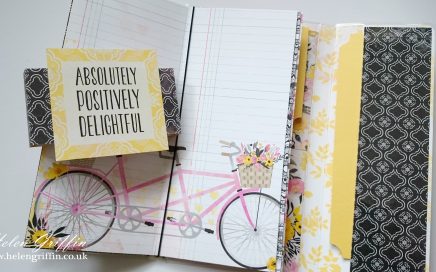
I had so much fun playing with this collection from BoBunny for this month’s Die-Cutting Essentials Magazine (issue 25), especially the bicycle die! I just love how they have mixed pink & yellow pastels with black. And I do love to add black into most of my projects, so these papers were perfect.
Today I have a paperbag tutorial to share with you today. This one is beginner friendly and all you need are 6 paperbags and your favourite papers to get started.
I have a new toy to add to my collection of punch boards…this one is the Pillow Box Punch Board and I’ve been having a lot of fun getting to know it. Here is a quick project along with a demonstration on how to use it.
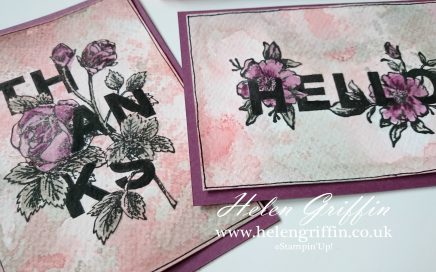
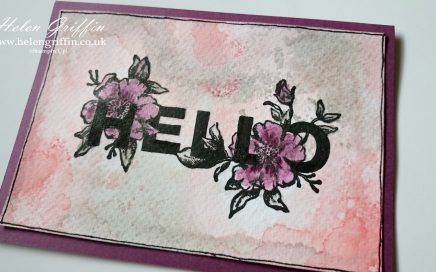
We’ll be using our inks as watercolours today and this technique is perfect for those that haven’t had a try yet. This beautiful floral look is the easiest to achieve, so why not give it a try today.
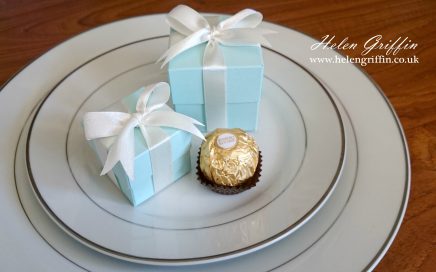
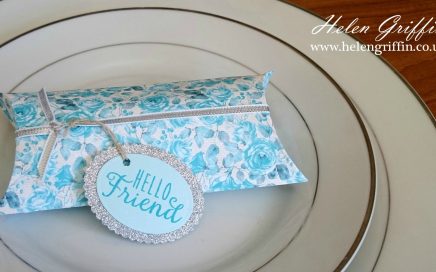
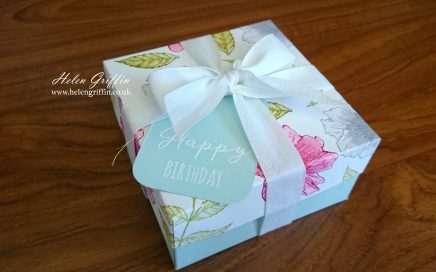
We are fast approaching the busy wedding season and these beautiful little boxes won’t disappoint. Making your own table favours not only keeps the costs down, but are also your own personal touch to your special day.
This card is very easy to make with just a few score lines and coordinates perfectly with last weeks satchel – the perfect pair to give away.
Do we really have to say goodbye to Cupcakes and Carousels? I have had so much fun with this Suite, from cards to mini albums. Here is Monday’s card and it highlights the lovely colours in this collection.
I’m really enjoying the pink, gold and black look at the moment and today we get creative with ink and water too. Get your aprons on! This is going to be fun!
Stampin’Up!’s Clear Treat Boxes are ideal for making favours and treat boxes – you can have a bunch of treats ready to go in no time at all.
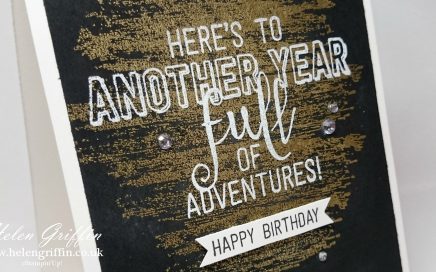
Ooo, I just love it when a beautiful card comes together! I’m going to save this one for my favouritest person to give to….I’m sure I’m not the only person that does that?! Anyone else?
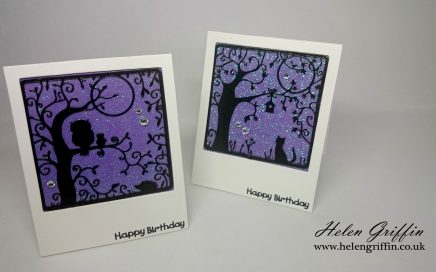
I found something fantastic and I can’t wait to share it with you all. On my travels to craft shows, I came across self adhesive glitter sheets and they are the BOMB! Without the actual glitter bomb mess.
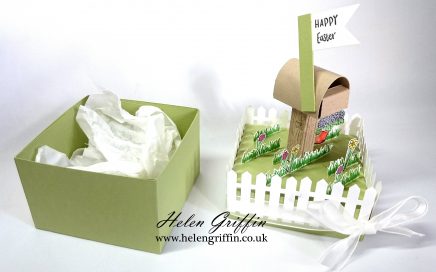
We are ending the Springtime Series with a cute Easter treat box, complete with picket fence and miniature post box – the post box is simply adorable and you can even hide a little treat inside!