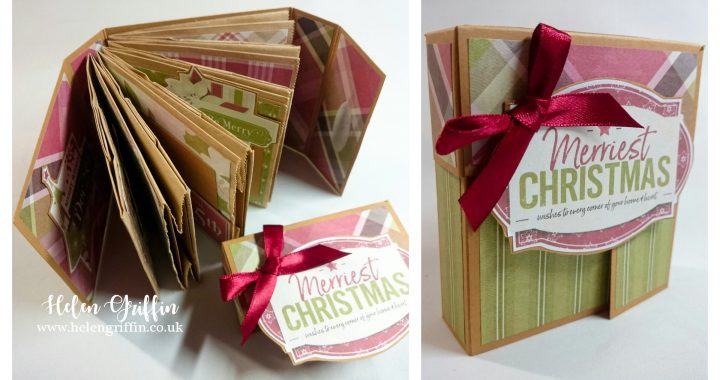
For day 2 we have a really easy paperbag album to make. This tutorial will take you though it step by step, so you can join in whatever size of bag you use.
This is one of my favourite ways of putting together a paperbag album. I have teamed it up with a digital paper collection from Nitwit Collections called Classic Christmas. The best thing about using digital papers, is that they can be used any time of year – there’s no waiting for the right season for the shops to stock them.
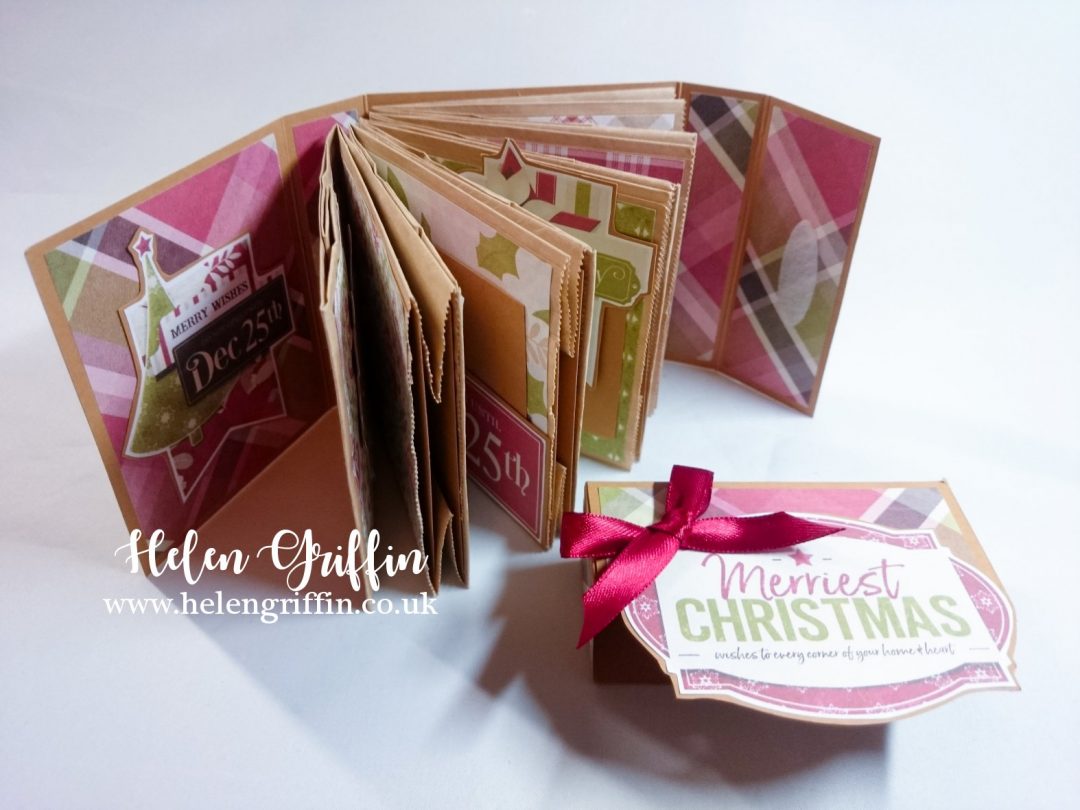
Everything I have used is listed down below, the tutorial, and cutting guide.
I hope you enjoy today’s tutorial! There are still 3 more days to go!
Want to stay up to date with my projects and news? please join my email list HERE. You will only receive notifications on my latest posts, and nothing else.
Helen x
Cutting guide
Page Mats
3.25″x3 1/8″ | 3.25″x 2″ | 3.25″x 1 7/8″
Cover
3.75″x 10″ Score at 1.50″,2.5″, 6″, 7″
Cover Mats
3.5″x 3.25″ | 3.5″x 2.75″ | 3.5″x 1.25 | 3.25″x 0.75″
Lid
6 9/16″x 4 1/16″ Score at 1.5″ on all sides
Lid Mats
3.25″x 1.25″ | 3.25″x 7/8″ | 1.25″x 7/8″
Supplies
GET 20% OFF YOUR FIRST ORDER WITH CRAFTSTASH WHEN YOU SIGN UP TO THEIR FREE NEWSLETTER
FREE UK delivery on orders over £15
FREE US shipping on orders over $70
FREE CANADA shipping on orders over $85
——- INTERNATIONAL POST AVAILABLE AT CRAFTSTASH——–
NEW US Craft Stash website – Click HERE
—- D I S C L A I M E R —- Some links are affiliate and do not cost you extra. Using them will support future projects that I bring to my Youtube channel & website. Many thanks for your continuing support